

In this post, we'll show you how to create and download a SOPAS file to CLV6xx barcode scanners, Lector6xx image-based code readers, and RFID using SOPAS V3.0. Click on the images to see in full size. Also be sure to check out our procedure on How to View Diagnostic and Host Data in SOPAS Terminal.
SOPAS File Creation
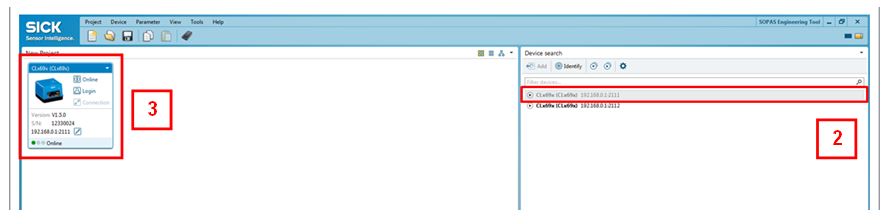
Step 1: Open SOPAS. It will automatically look for a scanner and list the scanners in the Device Search screen.
Step 2: Double click or drag scanner to New Project side. Note: Best practice is to select IP Port 2111 for Ethernet connections.
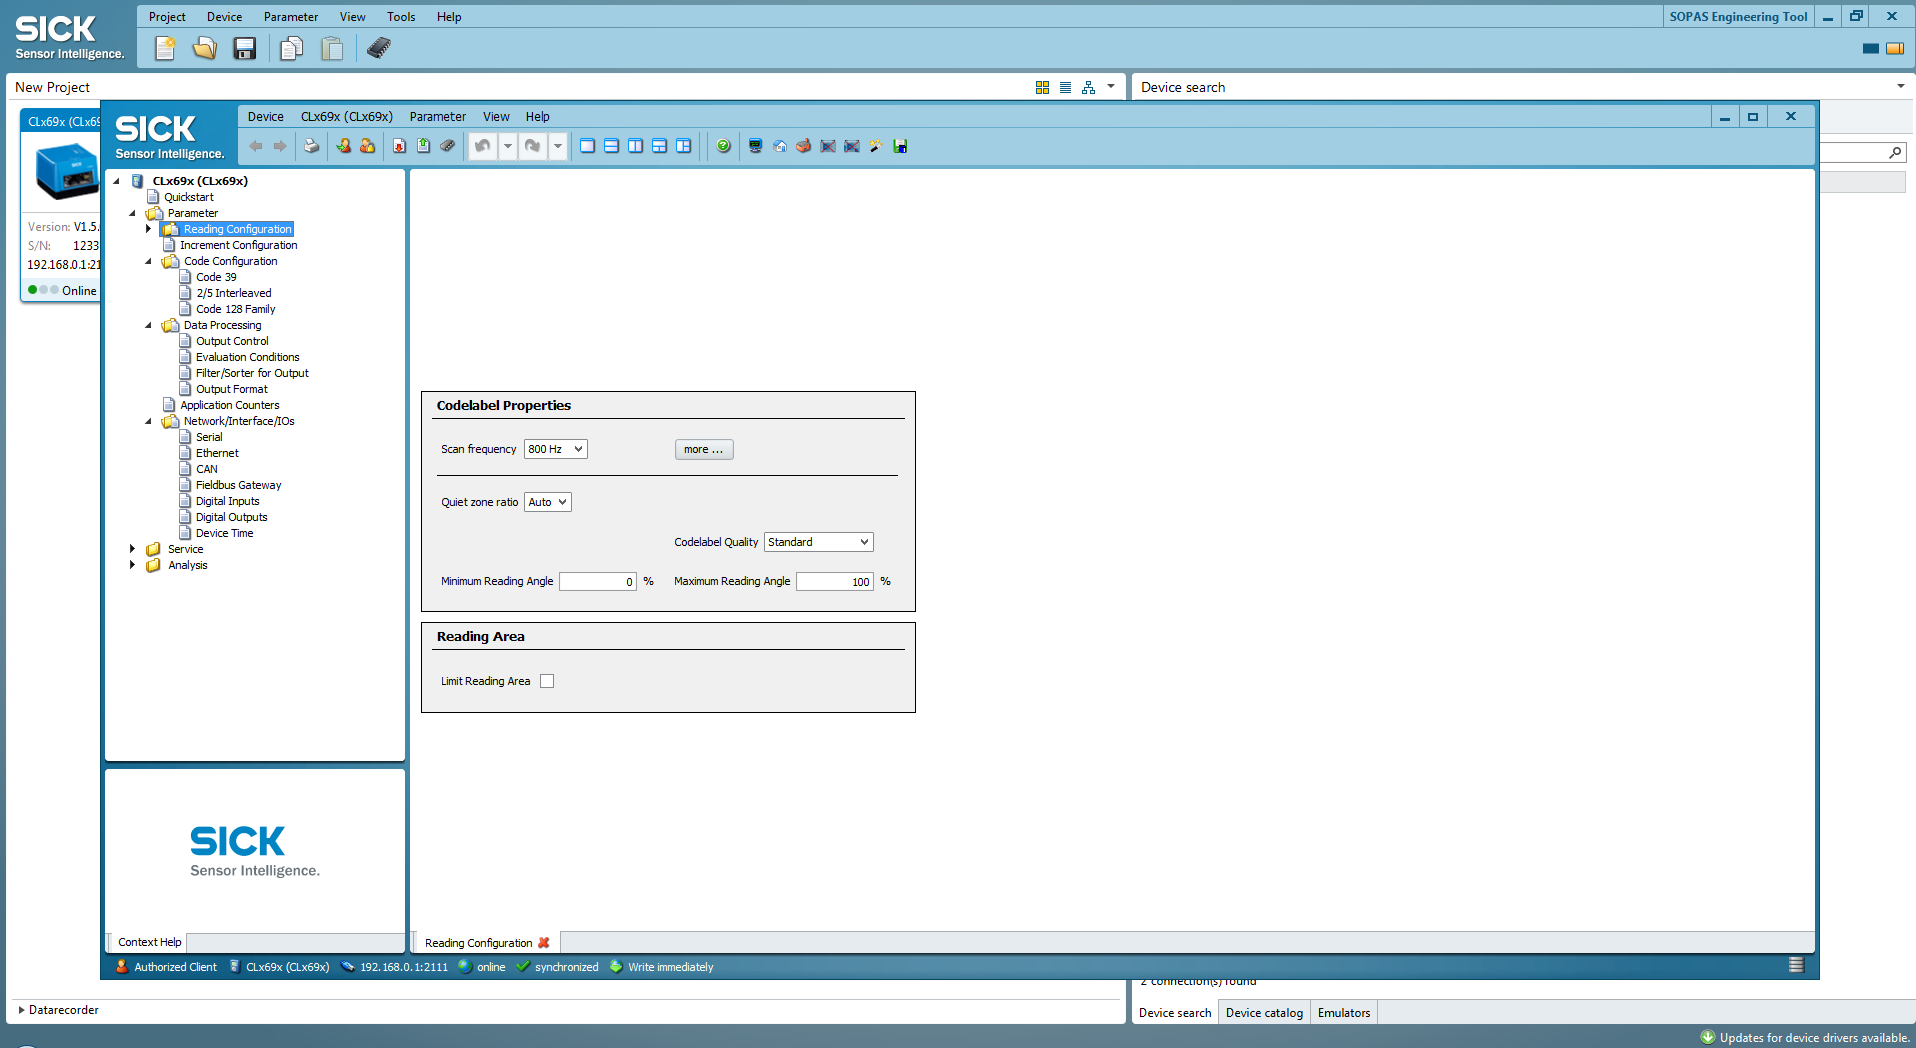
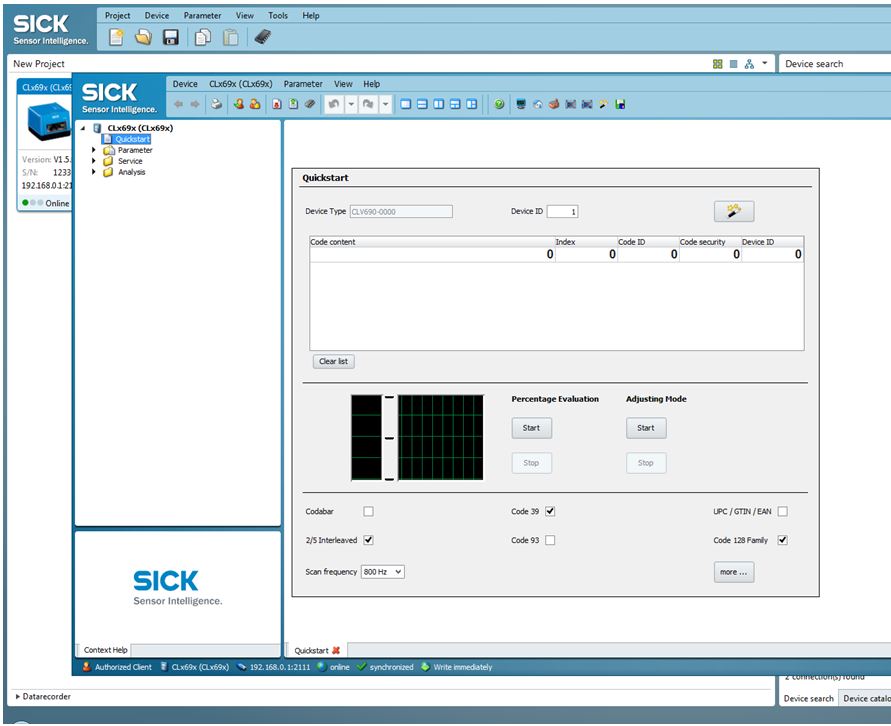
Step 3: Double click on tile (scanner image) to bring up scanner.
Step 4: Make changes to parameters and go back to the main project screen.
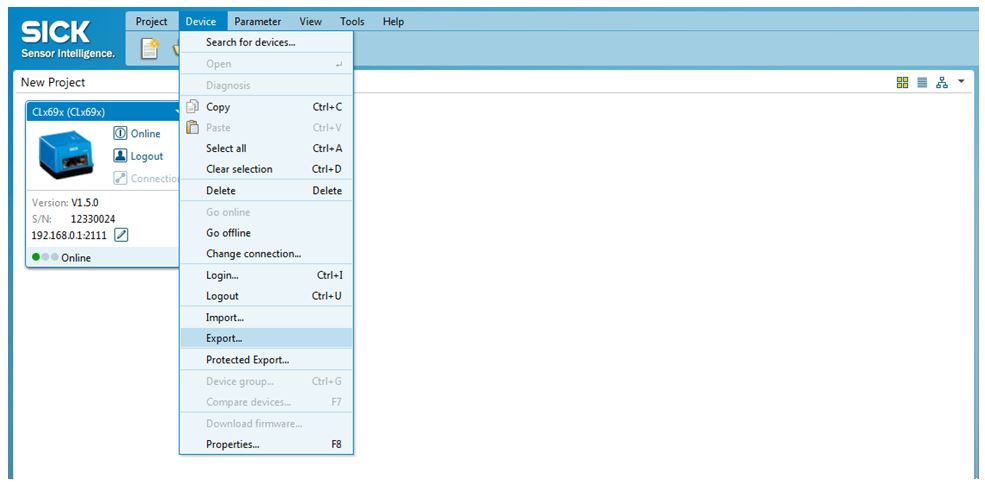
Step 5: To save file go to Device drop down menu and select Export.
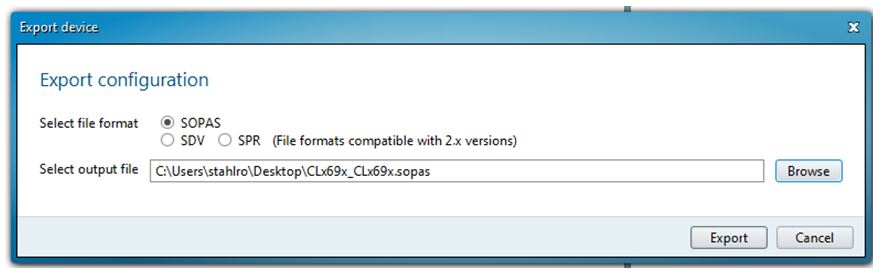
Step 6: Best practice use *.sopas file format, give your file a name, and click on Save.
Congratulations! Your new file has been saved on your computer.
SOPAS File Download
To download a file, start SOPAS and connect to CLV scanner, drag the scanner to the New Project side and double click on the scanner image (see Steps 1-3 above).
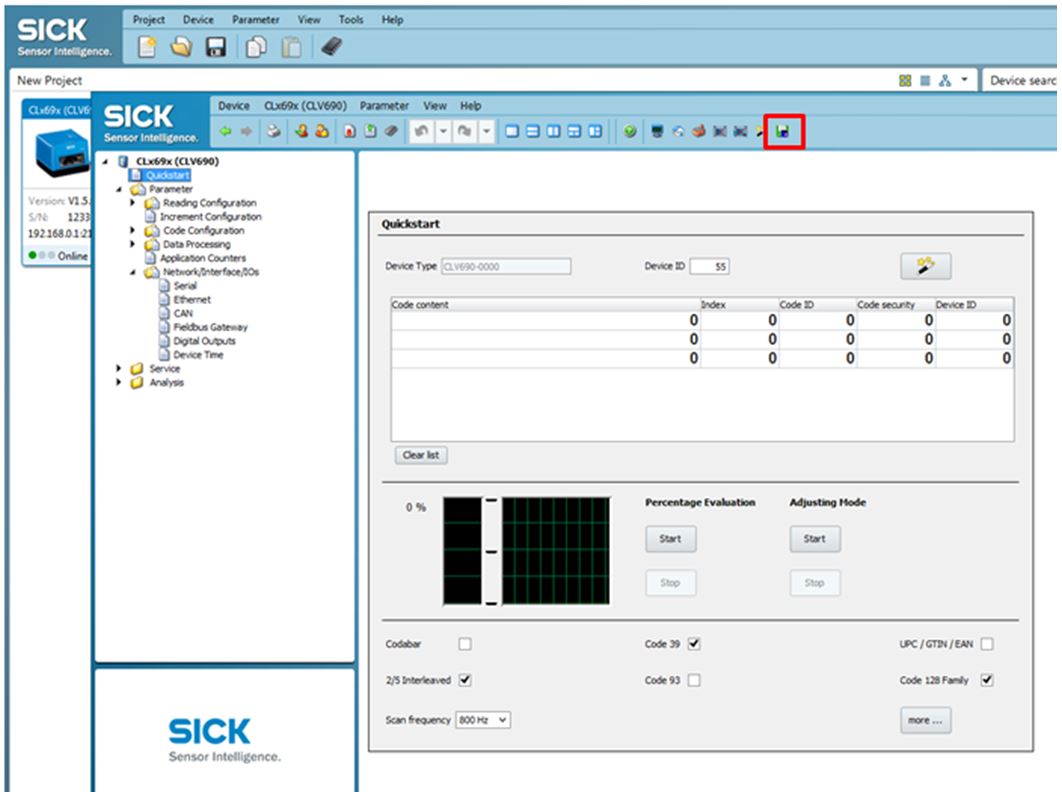
Next, go back to the main project screen.
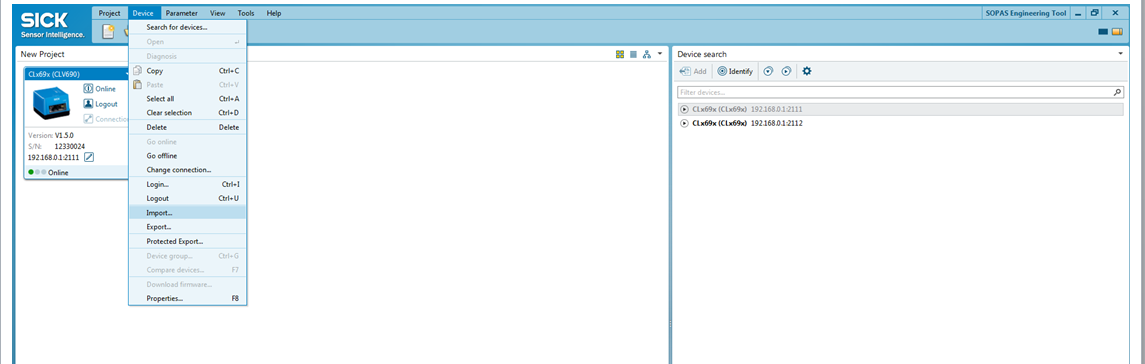
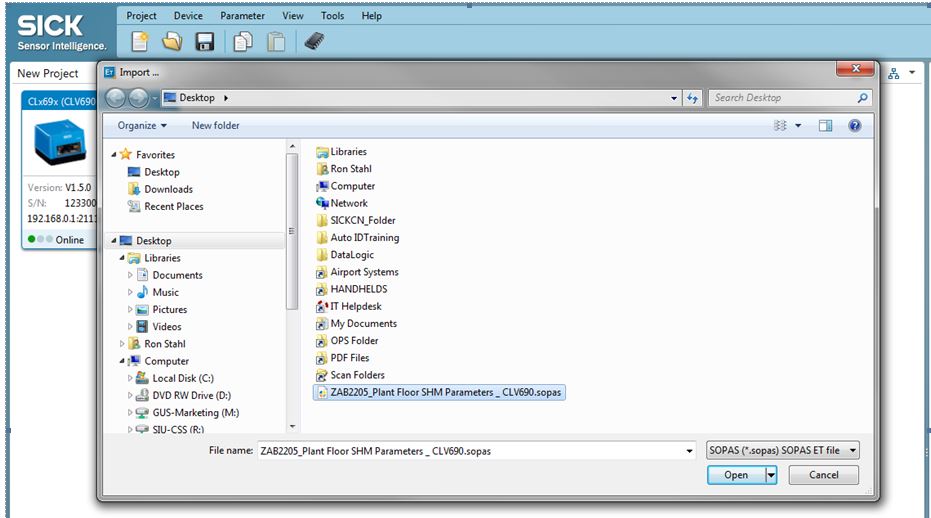
To download the file, go to Device drop down menu and select Import.
Select file to download.
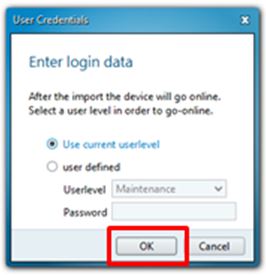
Click OK to start the download.
Finally, go back to the scanner page and click on Save Permanent icon
Download a PDF of these instructions: How to Create and Download a SOPAS file
Contact: Ron Stahl
Email: ron.stahl@sick.com
Direct: 952-829-4832